Do you remember the 2010s? Back then, pro cyclists were bent over their bikes, trying to squeeze out every last bit of speed. They aimed for a slammed stem and a zero-setback post, looking like pros on Instagram. But today, the pro peloton has changed its ways.
Now, the focus is on sustainable power, not just being bent over. It’s about finding a balance that works for both the rider and the bike.
Before we dive into the tools, let’s talk philosophy. A pro-level setup is all about finding the right balance between the rider and the bike. It’s about using data to improve, moving away from the old ways of doing things.
Today’s pros use advanced tools like 3D motion capture and Retül data. They’ve ditched the old, painful postures for something better. Speed now comes from sustainable power and consistent performance over long distances.
This isn’t just about bike fitting; it’s about creating a perfect match between you and your bike. Every detail, from the height of your bars to the length of your cranks, matters. To learn more, check out our guide to choosing a racing bike. It helps you pick the right frame and geometry for your needs.
Fit vs comfort vs power balance
Chasing the perfect bike fit is like chasing a mirage. You think you’ve found the perfect professional bike setup, but it’s not real. The truth is, you’re not chasing one goal, but three: fit, comfort, and power. Finding the right balance between them is like solving a complex problem.
Your bike fit is about finding peace between fit, comfort, and power. It’s not about achieving one perfect state. It’s about finding a balance that works for you.
The Saddle: Your Biomechanical Anchor (And Possible Torture Device)
Your saddle is the foundation of your bike position. Get it wrong, and everything else is affected. It’s not just about avoiding a sore backside. It’s about creating a stable platform for every pedal stroke.
Height and Fore-Aft: The Foundation of Your Bike Fit
Let’s talk numbers for a professional bike setup. The “heel-on-pedal” method is outdated. Use the 88% of inseam rule for a saddle height estimate. But the best method is the 25-35° knee bend at the bottom of the pedal stroke.
Fore-aft positioning is key. The UCI’s 5cm rule is a good starting point. But the goal is to place your knee for optimal force application. A good starting point is to drop a plumb line from the front of your forward knee; the ball of your foot should be directly below it when the crank arms are horizontal.
Tilt and Nose: The Devil in the Details
The myth of the “perfectly level” saddle is common. A dead-level saddle can cause discomfort. A slight downward tilt of 1-3 degrees can make a big difference. It’s not about the bubble level; it’s about how your body interacts with the saddle.
The Core-Power Connection: It’s Not Just Your Legs
A good bike fit goes beyond equipment. It’s about athletic performance. Your legs are the engine, but your core is the transmission. A weak or disengaged core wastes energy.
It’s Not Just Your Legs
A stable core is essential when driving with your legs. It prevents your upper body from becoming passive. A braced, neutral spine allows for a powerful, stable platform for your legs to push against.
Think of your core as the foundation of a building. A weak core means your legs can’t push with full force. This results in leaked power, wasted energy, and a sore back. Engaging your core locks your power into the pedals instead of letting it dissipate.
Remember, power comes from the ground up, but it’s stabilized from the core out. Ignore this, and you’re building a skyscraper on a foundation of Jell-O.
Cockpit and control positioning
The cockpit is more than just a place for your hands. It’s the control center where your body’s signals guide the bike. In the world of performance cycling, your cockpit is key. It’s where your body’s language meets the bike’s actions.
A good cockpit setup is essential. It can make a big difference in how you ride. Forget the old days of slamming the stem. Today, it’s about finding the perfect balance between speed and comfort.
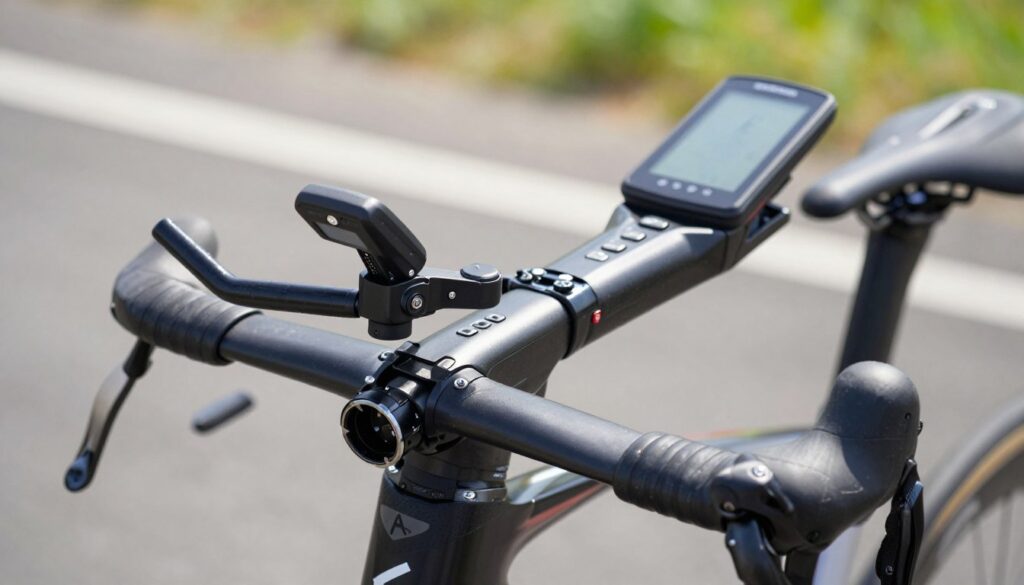
Stack and Reach: The Geometry of Control
Lower isn’t always faster. The pro peloton has moved away from that idea. Stack and reach are important for your bike’s setup.
Modern setups focus on finding the right balance. This means a slight increase in stack height. It’s not about being weak; it’s about being smart. It helps with breathing and reduces back strain.
Hoods, Drops, and the Art of the Switch
Your handlebars are more than just a place to rest your hands. They’re your control center. The hoods are for climbing and control, while the drops are for sprints and descents.
The key is to switch smoothly between them. This is where a pro-level setup shines. It’s about finding a balance between comfort and power.
Modern handlebars are designed for this smooth transition. They offer multiple hand positions for different needs. Your cockpit should support this fluid movement.
The Rise of the (Slightly) Higher Stack
The trend is moving away from slammed stems. A slightly higher stack is preferred. This allows for better breathing and a more sustainable position.
This change is about optimizing performance. It’s not about sacrificing speed for comfort. A 10mm increase in stack can make a big difference.
This shift is seen in component trends. Stems are getting shorter, and the focus is on finding the right balance. The goal is to maximize power and aerodynamics over time, not just in the beginning.
For more on cockpit ergonomics, check out this detailed guide. The perfect cockpit is a mix of power, comfort, and control.
| Position | Primary Use | Ideal Setup | Pro-Tip |
|---|---|---|---|
| Hoods | Climbing, Long Miles, Control | Hoods level with or slightly below saddle height | Top of hoods should align with or be just below the saddle for a neutral wrist position. |
| Drops | Descending, Sprinting, High Speed Control | Drops should be reachable without shoulder hunching | Your back should be nearly flat when in the drops for optimal aero. |
| Hoods (Secondary) | Climbing, Casual Riding | Top of bar 2-4cm below saddle for aggressive; level for endurance | You should be able to cover the brakes from both hoods and drops with one finger. |
This table is a guide, not a rule. The best cockpit setup is one that feels natural. It’s about riding like a pro, not just looking like one.
Suspension and rebound tuning
Think your bike’s suspension is the star of the show? Think again. In high-performance cycling, your body is the main suspension system. The carbon, titanium, and rubber are just the delivery system.
The true magic—and the key to a professional bike setup—is tuning your body. Forget the pogo stick. We’re not bouncing to the coffee shop. This is about becoming a tuned, reactive, and incredibly efficient human suspension unit.
This isn’t just about comfort on a long ride; it’s the physics of control. A rigid body on a bike is like a shopping cart with square wheels—every bump is a direct, jarring transfer of energy. A tuned human suspension, on the other hand, absorbs, dampens, and recovers.
It transforms you from a passive passenger into an active, integrated part of the machine. It’s the difference between being a sack of potatoes and being a shock absorber.
Your Body is the Suspension
Forget the myth of the “perfectly rigid aero tuck.” That’s a one-way ticket to a sore back and a nervous, skittish bike. Your body is a complex, biological suspension tuning masterpiece.
The goal isn’t to lock yourself in place, but to become a dynamic, reactive system. When your bike hits a bump, the energy has to go somewhere. A rigid body sends it rattling up the spine. A tuned body absorbs, dissipates, and channels that energy.
Think of a professional motocross rider. They don’t fight the bike; they flow with it, using their arms and legs as primary and secondary suspension systems. Your road bike demands the same philosophy. Your professional bike setup isn’t complete until you, the engine, are also the primary damper.
The Elbows: Your Primary Dampers
Your arms are not just for steering. They are your high-speed compression and rebound adjusters. The key is in the slight, supple bend.
Locked-out, straight arms turn your upper body into a tuning fork, transmitting every vibration from the road to your shoulders and neck.
The pro’s secret? Relax. Keep a soft, but not floppy, bend in the elbows. This “micro-suspension” in your arms acts as the first line of defense, absorbing high-frequency buzz from the road surface before it can travel to your core.
It’s the difference between feeling every grain of asphalt and floating over it. A neutral spine and relaxed shoulders, as noted in biomechanical studies, allow this system to work. Stiff shoulders are your enemy; they turn your arms into rigid struts.
The Legs: Suspension with a Power Stroke
Your legs aren’t just for pedaling. On a climb, they’re pistons. On a descent, they’re your secondary shock absorbers. The key is to think of your legs as active, not passive, suspension.
This isn’t about standing up and down like a pogo stick. It’s about maintaining a connection to the bike through your feet and seat, allowing your hips and knees to act as a secondary, low-speed damping system. It’s the same principle you’d apply in a motorcycle suspension guide, where the rider’s legs are the final, tunable element of the chassis.
Your legs don’t just push down on the pedals; they modulate the bike’s contact with the road.
True performance isn’t just about watts or weight. It’s about integration. When your elbows and legs are actively managing the bike’s chatter and impact, you’re not just more comfortable—you’re faster. You’re not fighting the bike; you’re working with it.
The road is no longer an adversary. It becomes a surface you and your machine are actively interpreting, a dynamic dialogue between rider, road, and machine. That’s the final, and most critical, piece of the professional bike setup puzzle.
Common setup mistakes to avoid
Riders often make mistakes that hurt their performance. Let’s look at the usual errors.
The Usual Suspects: A Rogues’ Gallery of Errors
Trying to find the perfect riding position can be a trap. It can make your bike feel like a torture device.
The Sins of the Saddle
Your saddle is key. If it’s too high or too low, you’ll lose power and risk injury. A pro setup finds the right balance to avoid pain and inefficiency.
Cockpit Catastrophes
Some riders choose a stem or bar drop that’s too long or extreme. This common mistake hurts power and control. Your handlebars should help you, not hurt you.
The Geometry of Hubris
Copying a pro’s aggressive setup can be a big mistake. It might look cool, but it can hurt your performance. A good setup is tailored to you, not copied from someone else.
Learning to set up your bike is key. A pro setup turns your bike into an extension of you.